Publicité

Browsing this Thread: 1 Anonymous Users
(1) 2 »
itssanjib itssanjib
  • Hardware murderer
  • Hardware murderer
  • Joined: 08/04/2015 18:15
  • From Kolkata, India
  • Group: Registered Users
  • Posts: 25
  • Offline
  • Posted on: 12/11/2015 09:04
Scratch Build- Metal Hero #1
Hi… this is all about a new project, and this time it is a scratch build.


The basic idea was to plan and design a cabinet that would hold the motherboard and all other accessories like GPU, cooling system, HDDs, PSU etc. in a most convenient way. Oh yeah, and it had to look awesome as well!


First I thought about the places to put the components—especially the motherboard, the cooling system, Hard Disc bay and the PSU.


Hard Discs and PSU are by far the least heat generating components and hence placed at the bottom of the case.


What I concentrated most is the placement of the motherboard. After using quite a few different cabinets and the placement of the mobo in 2 different ways, I always felt that if the mobo is placed at right angles to the traditional setup then it would be optimal for the cooling setup. In a usual system hot air from the GPU usually makes the inside of the cabinet hotter. It also goes up heating up the CPU VRMs and then the hot air actually goes through the radiator if it’s placed on the top. But in case of a horizontal tilt the hot air moving up ventilates through the top and very less goes to the CPU area. This has one caveat though: the usual top mounting radiator position becomes unavailable.
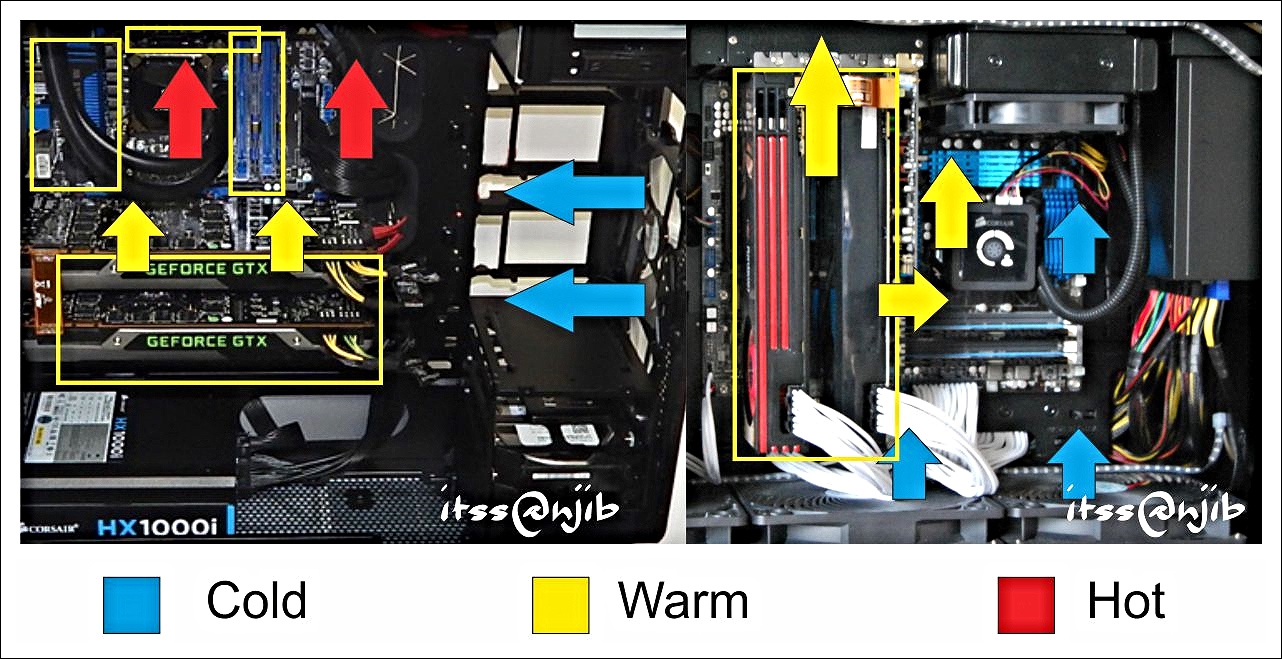

Image redimensionnée


So I thought of putting the radiator on the right side of the mobo, i.e. on the front of the cabinet. The reservoir with the pump in front of it.


I started working on this and made a few designs in 3D to see how it was going to look. Then chose a favorable design, worked on the placements and took proper measurements.
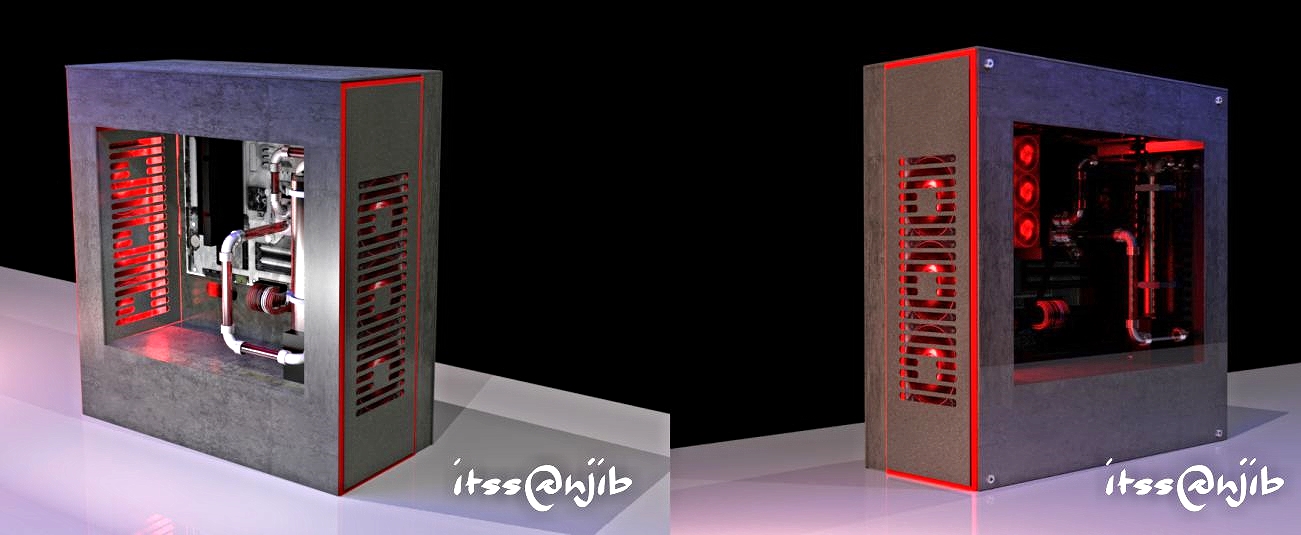

Image redimensionnée


Here I got a massive help from the Asus India. After showing a brief presentation on the concept they extended their hand to provide me with a motherboard, processor, graphics card and memory modules. With the new hardware on board, I started thinking about evolving the design a bit.


A lightbulb flashed all of a sudden inside my head – why not make this a test bench?


There are multiple plus points of making a case a test bench type. First and foremost easy removability of hardware, which was a priority in my case. I always tinkered with multiple stuff, and it made perfect sense. But changing the case to a testbed required minor changes. Most importantly, the cooling system would have to fitted and planned in a way that the hardware could be swapped or changed effortlessly.
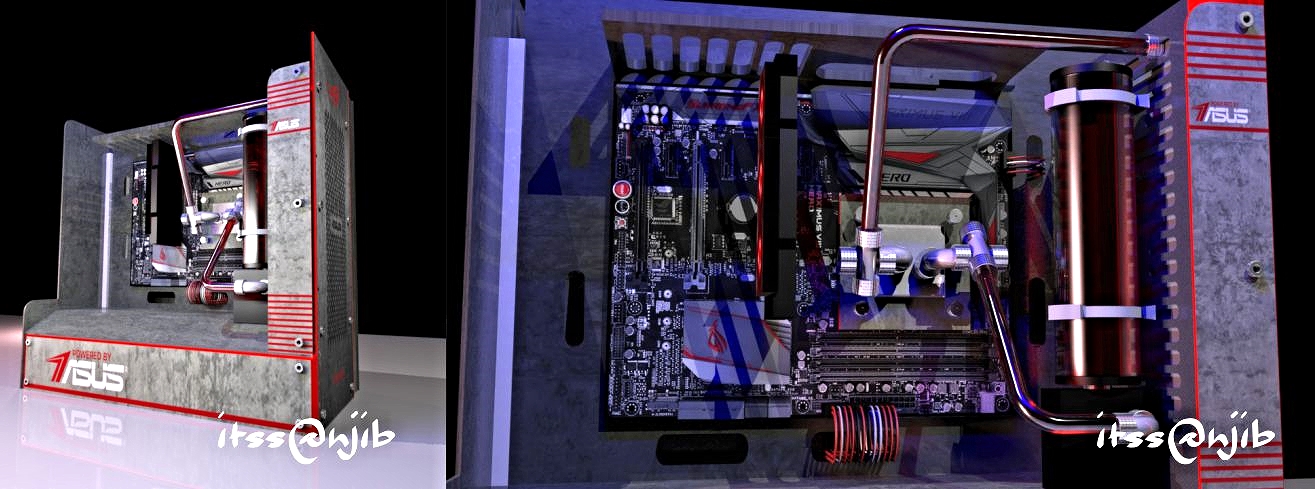
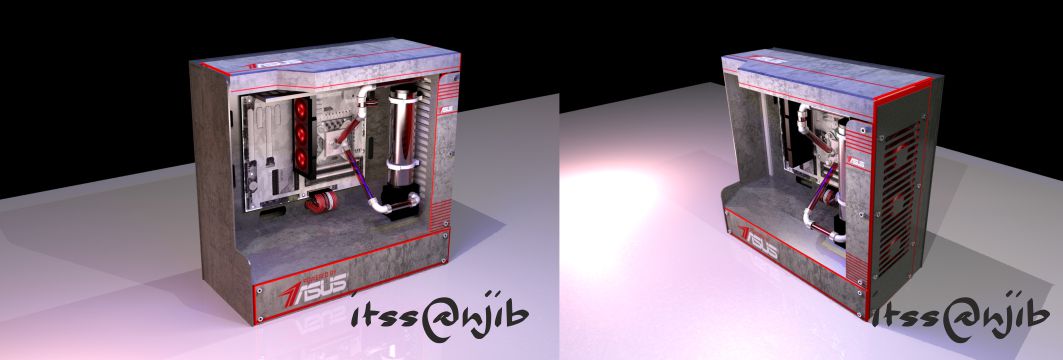
Image redimensionnée


Image redimensionnée


Now its time to choose the name for the build. While looking at the design the first thing came in my mind is the word Hero, and as am going to make a test bench and metal work is going to be there so why not Metal Hero.

Image redimensionnée


Now to start the work, need the structure design.
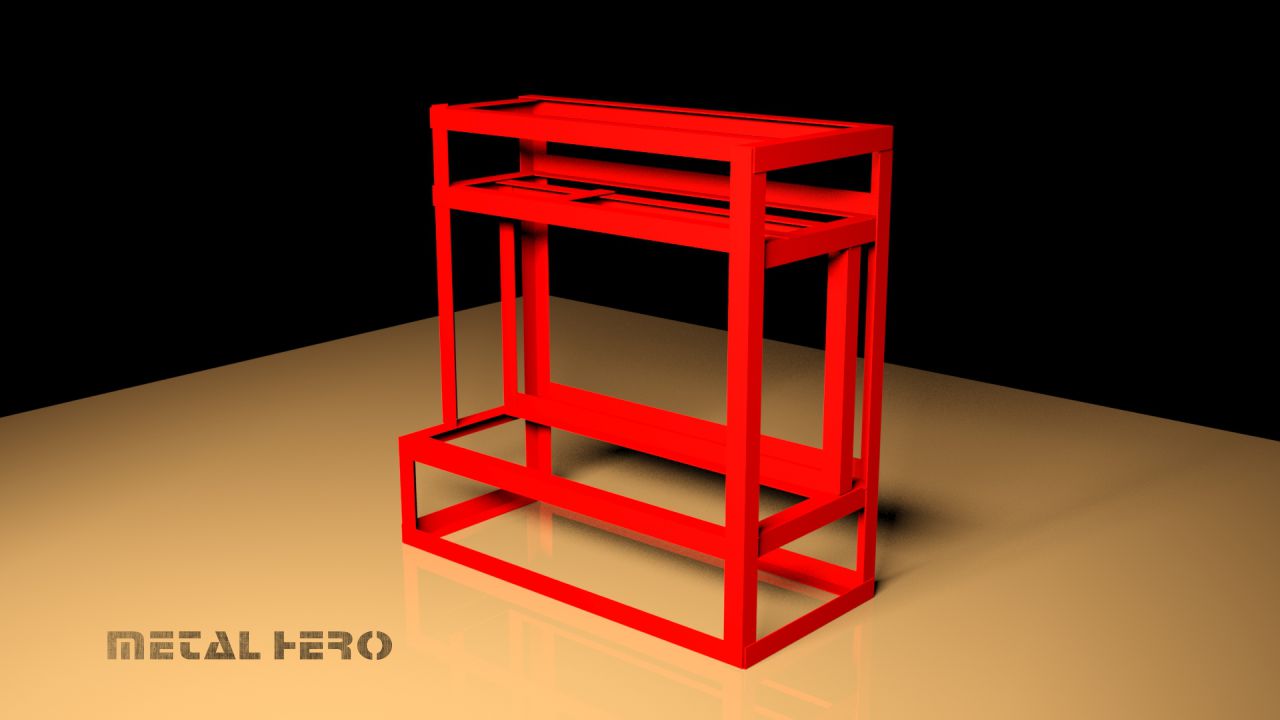

Image redimensionnée


I chose Aluminum L channels to make the basic structure and started working on it. As the work progressed I found out that I was unable to keep the right measurements all the time and hence the structure wasn’t going to be precise enough and hold everything in their right places.


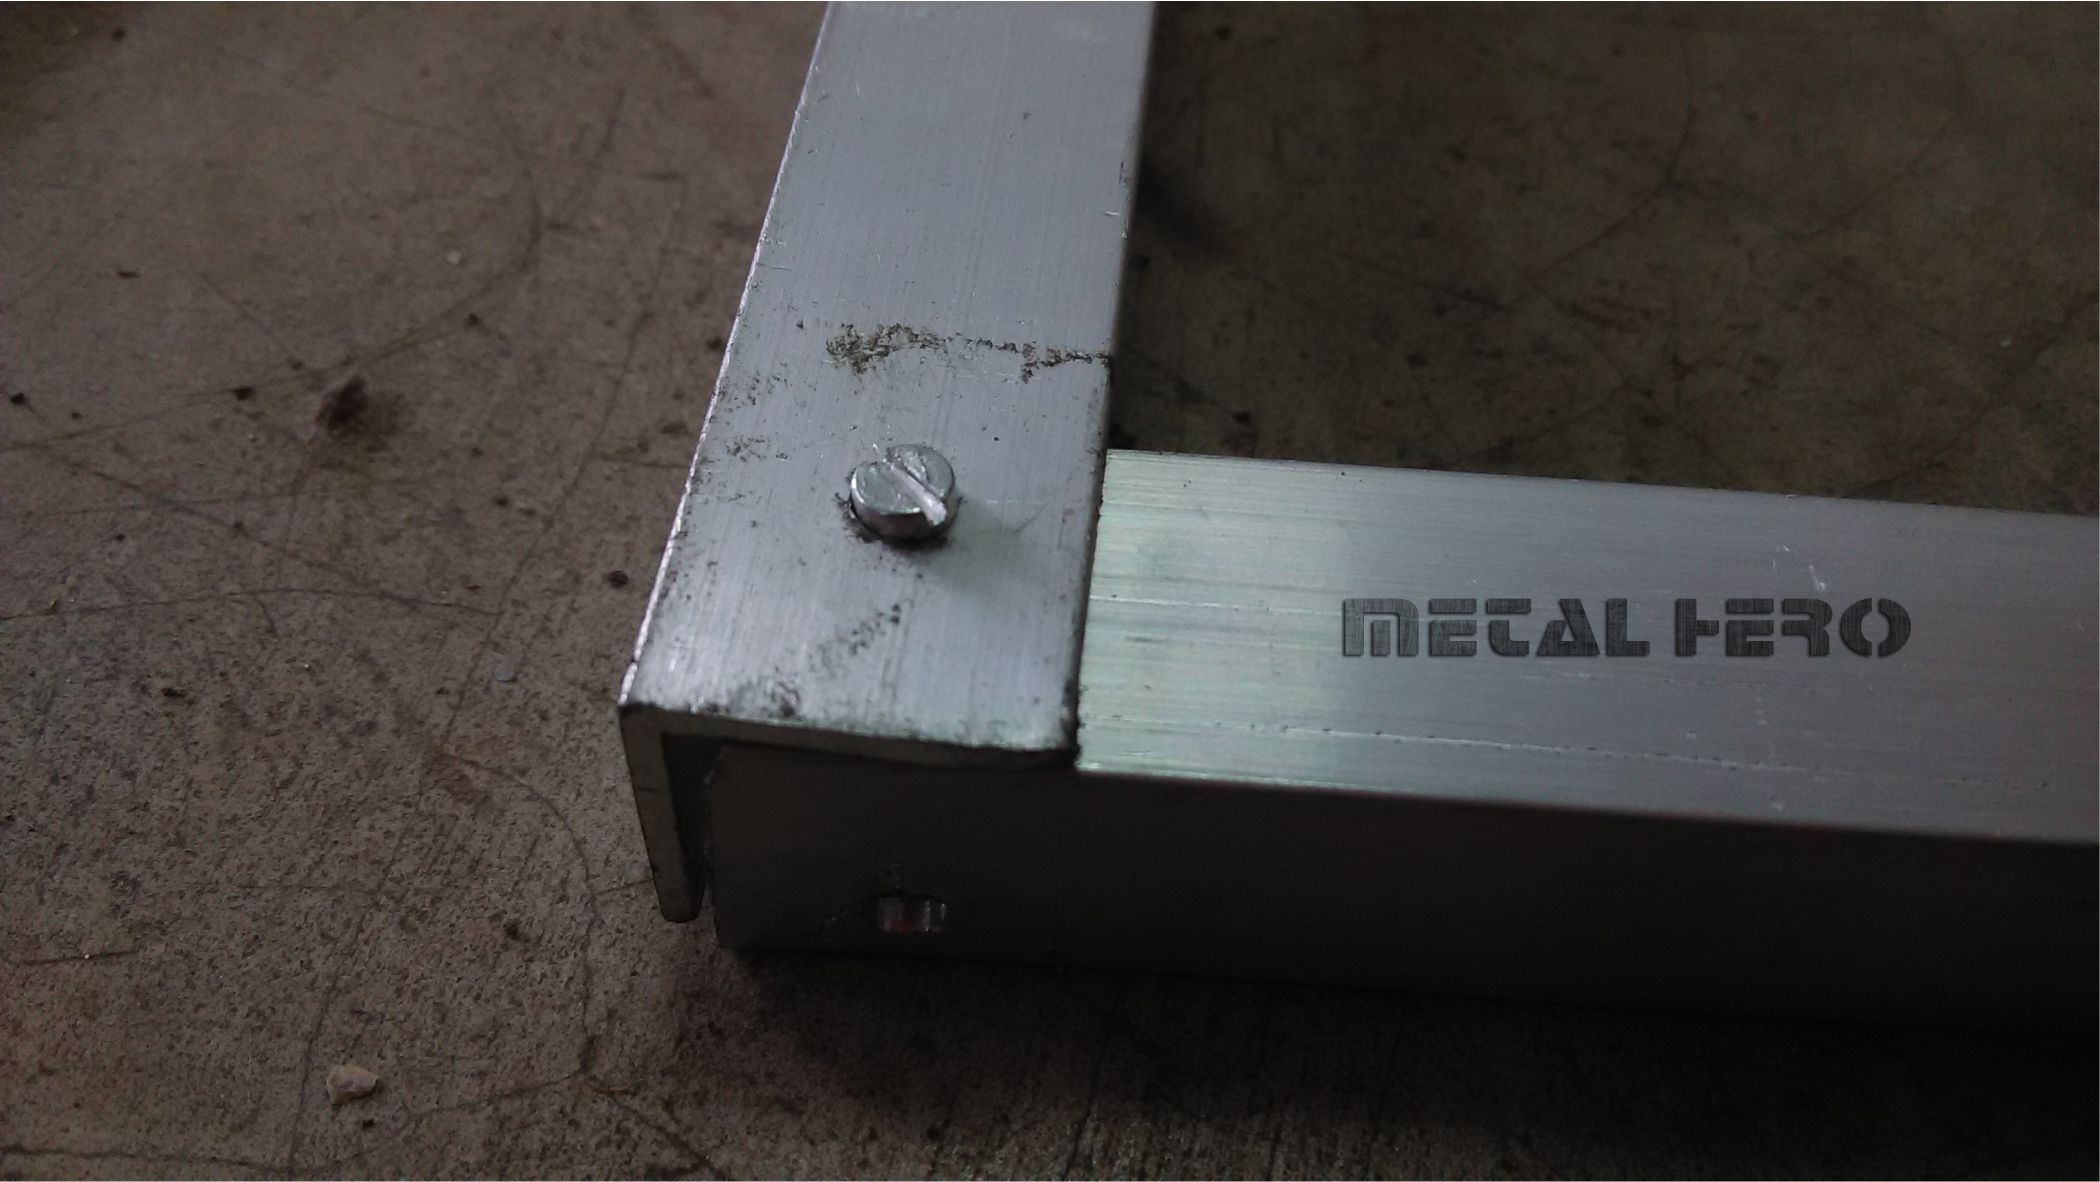
Image redimensionnée

Image redimensionnée

Image redimensionnée
itssanjib itssanjib
  • Hardware murderer
  • Hardware murderer
  • Joined: 08/04/2015 18:15
  • From Kolkata, India
  • Group: Registered Users
  • Posts: 25
  • Offline
  • Posted on: 14/11/2015 11:39
Re: Scratch Build- Metal Hero #2
As the work progressed I found out that I was unable to keep the right measurements all the time and hence the structure wasn’t going to be precise enough and hold everything in their right places.

So as I was looking for some other alternatives, the first thing that came in my mind was to use wood. I got some 1” x 1” 6ft long wooden bits to start with, and then bought some tools and found out its easier to work with, so slowly moved forward and completed the basic structure.

Image redimensionnée

Image redimensionnée

Wheels and base added to the structure:

Image redimensionnée

Time for some Stress Test....

Image redimensionnée

After successful testing time to check the positions of the psu and radiator.

Image redimensionnée

Thanks a lot ASUS India for giving me the Maximus Hero, gtx 980 matrix and 6600k.... along with DDR4 ram....

Image redimensionnée Image redimensionnée
rewarder rewarder
  • Webmaster
  • Webmaster
  • Joined: 05/07/2004 10:54
  • From Zürich CH
  • Group: Registered Users Webmasters
  • Posts: 3193
  • Offline
  • Posted on: 17/11/2015 09:15
Aw: Scratch Build- Metal Hero #3
oh boy ... this is going to be awesome!
itssanjib itssanjib
  • Hardware murderer
  • Hardware murderer
  • Joined: 08/04/2015 18:15
  • From Kolkata, India
  • Group: Registered Users
  • Posts: 25
  • Offline
  • Posted on: 17/11/2015 12:05
Re: Scratch Build- Metal Hero #4
For Metal Hero I have chosen Rigid tube for the Custom LC setup, though its hard to remove it and then dismount the mobo from the test bench. Here i have tried to make a loop with the rigid tube where I can dismount the cpu block screws and then pull out the Cpu block along with the tubings as using lots of Rotary fittings, and then the mobo can be easily dismounted. Then something came in mind to light up the Rigid tubes from isde with the help of LED and got some 4 ways fittings and some covered led with g 1/4 stop caps. But the led with the stop cap was longer than the 4 way connectors so it really wont work as its not possible to mount another fitting on the opposite side of the 4 way fitting like this:

Image redimensionnée

So went out locally and got some plumbing fittings with G 1/4 thread, the condition was horrible, so got thm a paint job and tried if it works as per my plan or not.

Image redimensionnée

and now to test it on a spare mobo to check the movements and see if the fittings are obstructing any other parts or not. Along with the rigid tubes to see how its going to be

Image redimensionnée

As it really worked well so time to move on and start putting the things inside the structure in their respective places

Image redimensionnée
itssanjib itssanjib
  • Hardware murderer
  • Hardware murderer
  • Joined: 08/04/2015 18:15
  • From Kolkata, India
  • Group: Registered Users
  • Posts: 25
  • Offline
  • Posted on: 20/11/2015 19:47
Re: Scratch Build- Metal Hero #5
Now its time to mount the mobo and the essential stuffs, to check the positioning and to move on with the work. Again many many thanks to Asus India for their immense support in this project....

Image redimensionnée

Image redimensionnée

Image redimensionnée

Image redimensionnée

Now its time to put the xspc raystorm Cpu block with custom brushed metal finish bracket... and 90* rotary adapters

Image redimensionnée

Firstly the idea was to put Aluminum brushed metal look on red acrylic, but the sticker was not good and after some time it started swelling so just peeled them out and ...

Image redimensionnée

Image redimensionnée

Image redimensionnée

After the paint job this is how the laser cut logos r looking like....

Image redimensionnée Image redimensionnée
rewarder rewarder
  • Webmaster
  • Webmaster
  • Joined: 05/07/2004 10:54
  • From Zürich CH
  • Group: Registered Users Webmasters
  • Posts: 3193
  • Offline
  • Posted on: 20/11/2015 20:30
Re: Scratch Build- Metal Hero #6
Very sexy man!
WaroQ WaroQ
  • Hardware murderer
  • Hardware murderer
  • Joined: 30/05/2014 04:07
  • From Jakarta, Indoneisa
  • Group: Registered Users
  • Posts: 37
  • Offline
  • Posted on: 23/11/2015 13:57
Re: Scratch Build- Metal Hero #7
great build man..
itssanjib itssanjib
  • Hardware murderer
  • Hardware murderer
  • Joined: 08/04/2015 18:15
  • From Kolkata, India
  • Group: Registered Users
  • Posts: 25
  • Offline
  • Posted on: 24/11/2015 07:29
Re: Scratch Build- Metal Hero #8
The fittings- extenders, 4 way female, both side male and many more just to put my imagination in reality....

Image redimensionnée

To take the measurements and finally how its going to look with the fittings and the tubes

Image redimensionnée

A bit of metallic touch to the GPU

Image redimensionnée

Now its time to cover the laser cut gaps and make them look great, so planned for a backlit thing and covering the gaps with Red stickers.

The Front:

Image redimensionnée

The Back:

Image redimensionnée

This is how its going to look ....

Image redimensionnée

using the 60 led/m 5050 SMD led tfor the backlit thing,

Image redimensionnée

so time to put the cover on the main body now..

Image redimensionnée

Image redimensionnée Image redimensionnée
itssanjib itssanjib
  • Hardware murderer
  • Hardware murderer
  • Joined: 08/04/2015 18:15
  • From Kolkata, India
  • Group: Registered Users
  • Posts: 25
  • Offline
  • Posted on: 26/04/2016 15:49
Re: Scratch Build- Metal Hero #9
Final Update.....

Time for some Premium Sleeved cables from TweakedPC... with custom length and colour scheme along with Black Cable Combs

The 8 [4+4] pins

Image redimensionnée

The 24 Pins

Image redimensionnée

The Full set of Grey Red and Black themed sleeved Cables

Image redimensionnée

Some addition to the black D5 pump and the Pump Top...

Image redimensionnée

The Bend Rigid Tube

Image redimensionnée

Now its time mount all the coloured parts and panels with a slight change in the panel from the previous post. As Asus India gave me a surprise upgrade from Maximus Hero to Maximus Hero Alpha, The motherboard that comes with the inbuilt LED connectors so i changed the Red coloured back lit vinyles to translucence vinyle that can show the colour of the LED...

Image redimensionnée

Image redimensionnée

Image redimensionnée

After putting up all the things, couldnt wait for a test run... and the main idea of Light coming trhough the rigid tubes and the coloured bubbles running through it, came out really well.. as expected..

Image redimensionnée

Now for the final outcome and the beautiful show of the Hero Alpha LED connectors and the Aura software

Image redimensionnée

Image redimensionnée

Image redimensionnée

Image redimensionnée

Image redimensionnée

So this is Metal Hero... the Scratch Build powered by Asus India and and build exclusively for them...

Image redimensionnée Image redimensionnée
itssanjib itssanjib
  • Hardware murderer
  • Hardware murderer
  • Joined: 08/04/2015 18:15
  • From Kolkata, India
  • Group: Registered Users
  • Posts: 25
  • Offline
  • Posted on: 26/04/2016 16:39
Re: Scratch Build- Metal Hero #10
Here is the video of the whole project.... to witness the cool light effects that this mobo can do

https://youtu.be/J3eYtya4290 Image redimensionnée
Scratch Build- Metal Hero [Build Logs / Projects] - ocaholic